Why I Started Designing Games — And Why You Should Too
We designers have the opportunity to work on a variety of projects, from mobile apps to content management systems; though our projects may be wildly different from each other, they always have a few things in common.
Even the most unrelated products share certain basic features, like bottom navigation, pop-up menus, detail view, profiles, notification centers, and more. These are different products, but similar patterns.
After designing a few applications in a row, I needed a change: something that would get me out of my design habits and give me some freedom. I decided to design a game and it was a blast — so now I’ll teach you!

Why Design Games?
1. Why not?
Seriously, why not? When you’re looking for a design project and choosing between designing another mobile or a web concept app, this is a third, radically different, challenging-but-fun exercise.
2. It’s the kind of fun that design is supposed to be
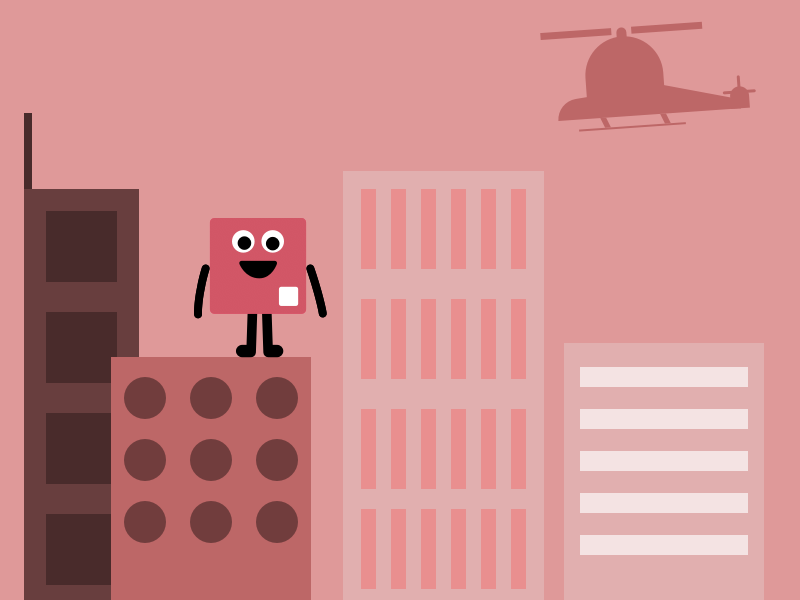
Imagine designing a little monster who jumps between buildings and destroying small helicopters that are trying to catch him. Sounds like a lot of fun, right?
This excitement will assist you during the design process. It happened to me!
3. Meet your next challenge
Even though game design doesn’t follow a specific set of rules, you still need to think about the user. Games should be fun, of course, but not at the expense of usability.
Usability challenges pop up everywhere, and it won’t take long to discover that creating games creates different challenges than in the mobile or web applications. For instance, how to do you tell a user that their monster is tired and it needs to rest up for a bit. Challenging, right?
4. No limits on UI
When designing the application for specific environments, we often rely on previously created components and patterns; for example, while design a mobile app, you’ll probably be working on a humdrum bottom navigation.
When designing your own game, there’s no limits on what you can do. The menu can be rounded or even look like a triangle, and there’s no need to rely on design systems or other peoples’ components. So long as you don’t forget about the user, you’re free to go where your creativity takes you.

Tips and Tricks for Creating Games
Now I’m going to sell you my tips and tricks that I learned while designing. I’m using them all the time when creating the games, and hope they will help you!
1. How to create an animated character
Let’s start with the simple stuff. Your animation is built with the frames, so you need to keep that in mind when designing your characters. When you are creating an animated character, those frames need to be on your mind.
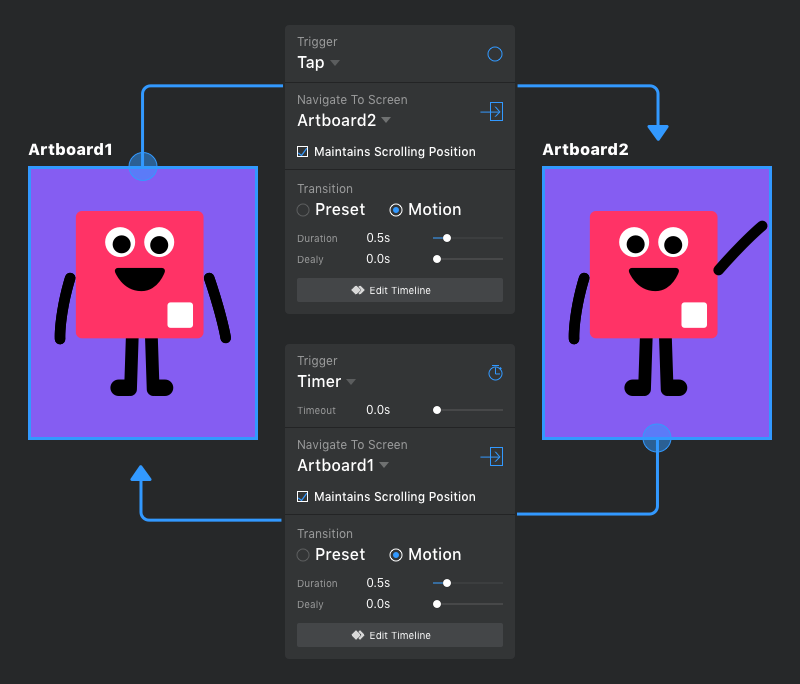
In our example, we’re going to make our character move his hand up and go back to idle position.

In the image above we can see two animation actions: the first is activated by tapping, which will simply start our animation, and the second is triggered by a timer. We set a timer with zero 0.0s — meaning that the second animation will start immediately after the first one.
2. IF this, THEN that: How to build logic in InVision Studio
In every game, we have a scenario which we as game designers need to handle: we have to let users choose their next moves. Without giving the users choices, we’re designing a movie.

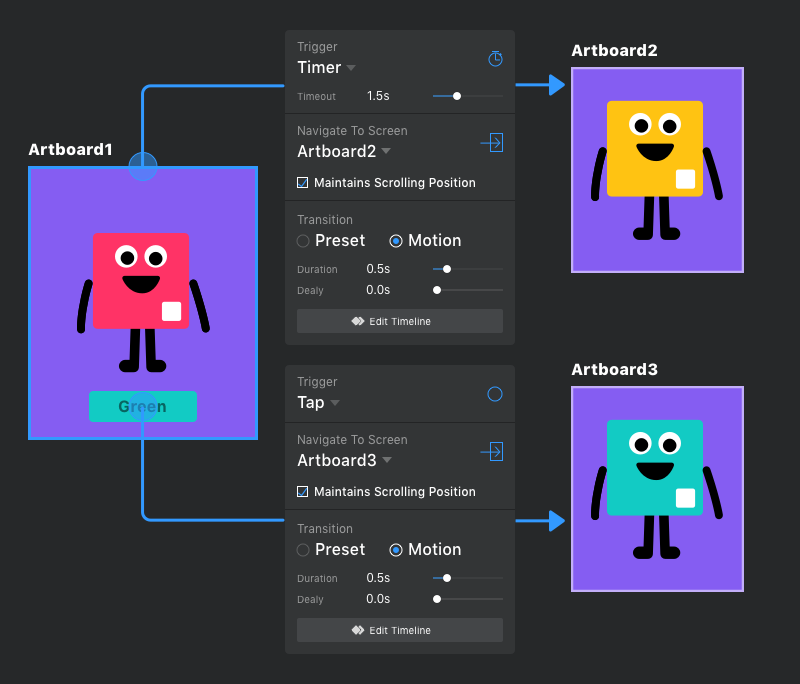
Building simple logic within Studio is easy:
In this image we see two buttons: the first button changes the color of the character to yellow, and the next button changes it to green.
This animation is a pretty standard one whose sole function is allowing users to choose colors.
3. The logic of timing
When you are trying to create games like “Guitar Hero” or “Dance Dance Revolution” where quick reflexes are essential, you have to factor in reaction time.
The app has to handle situations when the user clicks — or doesn’t click — the right button at the right time.

In this image, we can see all of the actions that can happen action; for example, when we click the button before 1.5 seconds have passed, our character will change to a blue color. If we are not quick enough, then our character will change to a yellow color.
The action corresponding to changing the color to yellow is hidden in the trigger timer, which is set to 1.5 seconds.
4. Use your keyboard
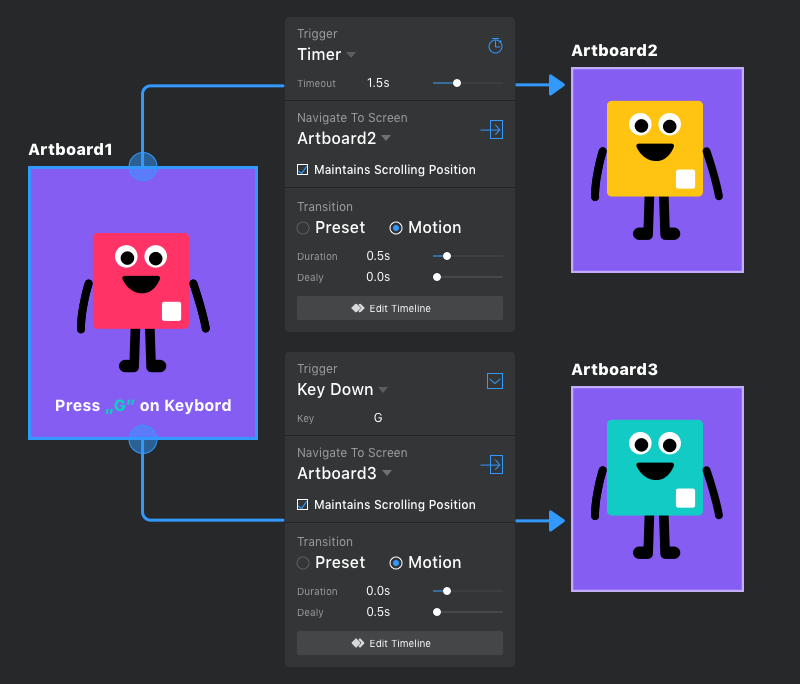
In the fourth situation, we have the same scenario as in the third image but are replacing the button for keyboard keys — which can be done in a single artboard!

Thanks for reaching the end of the article. I hope I helped you create an outstanding game that will put a smile on your face. Good luck!
BONUS: See How Michal Does It
Watch this video walkthrough to see how Michal designed this game — step by step!
To play the game for yourself, download InVision Studio and then download Michal’s source file!

Related articles
Supporting companies in becoming category leaders. We deliver full-cycle solutions for businesses of all sizes.


